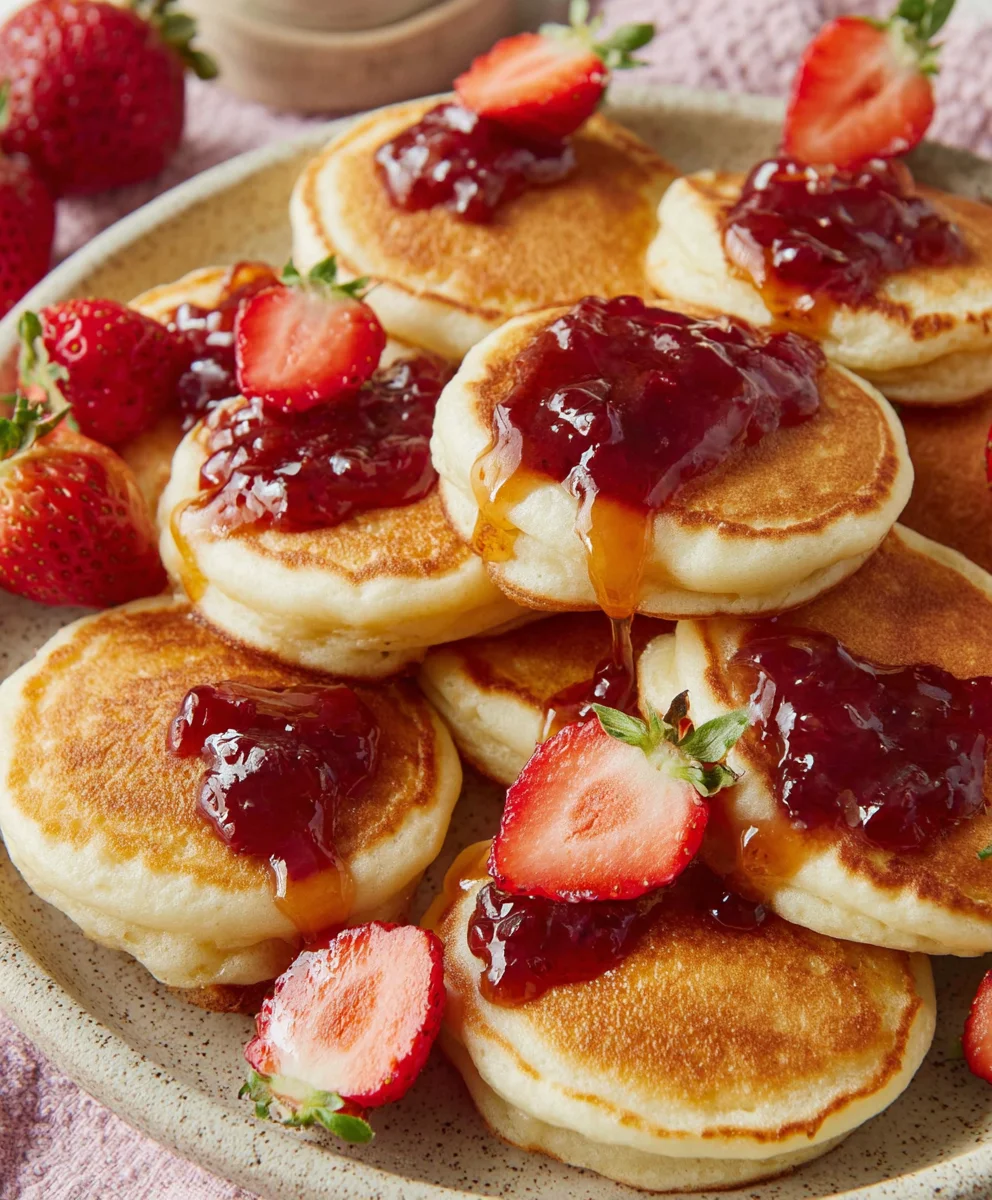
Welcome to the world of Pikelets! These small, fluffy pancakes are a beloved treat in many cultures, especially in Australia and New Zealand. Perfect for breakfast, brunch, or as a delightful snack, pikelets offer a comforting bite that can be enjoyed in a myriad of ways. Whether you top them with syrup, jam, or fresh fruit, these mini pancakes never fail to impress. In this article, we will explore an easy and delicious pikelet recipe that will soon become a favorite in your household.
Why You’ll Love This Recipe
If you’re searching for a versatile and simple recipe that brings joy to your table, look no further than pikelets. Here’s why you’ll love this recipe:
- Quick and Easy: This recipe is straightforward, requiring minimal prep time. In just a few simple steps, you can whip up a batch of delicious pikelets that everyone will adore.
- Flexible Toppings: Pikelets are incredibly versatile. You can dress them up with a variety of toppings. From classic butter and syrup to fresh fruit, whipped cream, or even savory toppings like smoked salmon, the possibilities are endless.
- Perfect for Any Occasion: Whether you’re hosting a brunch, having a cozy family breakfast, or preparing a snack for the kids, pikelets fit the bill perfectly.
- Kid-Friendly: These mini pancakes are not only delicious but also fun for kids to enjoy. They can help with the preparation and choose their favorite toppings.
- Great for Meal Prep: Make a large batch and freeze them for quick breakfasts throughout the week. Just pop them in the toaster, and you have a delightful treat ready in minutes.
Why You Should Try This Recipe
Trying new recipes is a fantastic way to expand your culinary skills, and this pikelet recipe is an excellent place to start. Here are some compelling reasons to give this recipe a go:
- Healthier Alternative: By controlling the ingredients, you can make pikelets healthier than store-bought options. Use whole wheat flour for added fiber or substitute sugar with a natural sweetener.
- Customizable: This recipe allows you to experiment with flavors. Add vanilla extract, cinnamon, or even lemon zest to elevate the taste. You can also make them gluten-free by using a gluten-free flour blend.
- Bonding Experience: Cooking can be a wonderful bonding experience. Get your family involved by letting them customize their pikelets with their favorite toppings.
- Impressive Presentation: Serve pikelets in a stack, adorned with fruits, a dusting of powdered sugar, or a drizzle of chocolate sauce for an Instagram-worthy dish.
- Deliciously Satisfying: The combination of fluffy texture and delightful flavors makes pikelets a satisfying treat that will keep you coming back for more.
Ingredients and Utensils Needed
Before we dive into the cooking process, let’s gather all the necessary ingredients and utensils to ensure a smooth cooking experience.
Ingredients
- 1 cup all-purpose flour
- 2 tablespoons sugar
- 2 teaspoons baking powder
- 1/2 teaspoon salt
- 1 cup milk
- 1 large egg
- 2 tablespoons melted butter
- Additional butter for cooking
Recommended Utensils
- Mixing Bowls: Use at least two bowls – one for dry ingredients and one for wet ingredients.
- Whisk: A whisk is essential for combining ingredients smoothly.
- Non-Stick Skillet or Griddle: This ensures even cooking and prevents sticking.
- Spatula: A spatula is needed for flipping the pikelets safely.
- Measuring Cups and Spoons: To ensure accuracy in your measurements.
- Serving Plate: To present your beautiful pikelets.
Detailed Recipe Steps
Now that we have our ingredients and utensils ready, let’s get cooking! Follow these detailed steps to make the perfect pikelets:
Step 1: Mix Dry Ingredients
In a large mixing bowl, combine 1 cup of all-purpose flour, 2 tablespoons of sugar, 2 teaspoons of baking powder, and 1/2 teaspoon of salt. Whisk together until well blended. This ensures that the baking powder is evenly distributed throughout the flour, which is essential for achieving fluffy pikelets.
Step 2: Combine Wet Ingredients
In a separate bowl, whisk together 1 cup of milk, 1 large egg, and 2 tablespoons of melted butter until fully combined. Make sure the butter is not too hot, as this could cook the egg. The mixture should be smooth and homogenous.
Step 3: Combine Wet and Dry Ingredients
Gradually pour the wet mixture into the bowl with the dry ingredients. Stir gently until just combined; be careful not to overmix. The batter should be slightly lumpy, as overmixing can lead to tough pikelets. Tip: It’s okay if there are a few small lumps; they will cook out during frying.
Step 4: Preheat the Skillet
Heat a non-stick skillet or griddle over medium heat. Add a small amount of butter to the pan, allowing it to melt and coat the surface. This step is crucial, as it ensures that the pikelets cook evenly and develop a beautiful golden brown color.
Step 5: Cook the Pikelets
For each pikelet, pour about 2 tablespoons of batter onto the skillet. Cook until bubbles form on the surface and the edges look set, about 2-3 minutes. Keep an eye on them; if they’re browning too quickly, reduce the heat.
Step 6: Flip the Pikelet
Using a spatula, carefully flip the pikelet and cook for an additional 1-2 minutes or until golden brown and cooked through. Tip: If the pikelets are browning too quickly, lower your heat slightly; you want them cooked through without burning.
Step 7: Keep Warm and Repeat
Remove the pikelet from the skillet and keep warm on a plate. Repeat with the remaining batter, adding more butter to the skillet as needed. Tip: You can keep the cooked pikelets warm in an oven set to low heat (around 200°F or 90°C) while you finish the batch.
Step 8: Serve and Enjoy!
Serve the pikelets warm, topped with your favorite jam, fresh fruit, or whipped cream. They are best enjoyed fresh but can be stored in an airtight container for a couple of days. Reheat in the toaster for a quick snack!
Tips and Variations
Here are some tips and variations to make your pikelet experience even more enjoyable:
- Vegan Version: Substitute the egg with a flaxseed meal (1 tablespoon of flaxseed mixed with 2.5 tablespoons of water) and use non-dairy milk like almond or oat milk instead of regular milk.
- Gluten-Free Option: Use a gluten-free flour blend to make these pikelets suitable for gluten intolerance. Ensure that your baking powder is also gluten-free.
- Add-Ins: Mix in chocolate chips, berries, or nuts into the batter before cooking for an extra flavor boost.
- Serving Suggestions: Get creative with toppings! Consider serving with yogurt, honey, or even a sprinkle of cinnamon sugar for a delightful twist.
- Storage Tips: To store, place cooled pikelets in an airtight container and refrigerate for up to 2 days. For longer storage, freeze them in a single layer and then transfer to a zip-top bag.
Nutritional Values and Benefits
Understanding the nutritional content of your food is essential. Here’s a breakdown of the nutritional values for each pikelet (makes approximately 8 servings):
- Calories: 90
- Protein: 2g
- Total Fat: 4g
- Saturated Fat: 2g
- Carbohydrates: 12g
- Dietary Fiber: 0g
- Sugars: 1g
- Sodium: 100mg
Pikelets can be a nutritious addition to your diet when enjoyed in moderation. The use of all-purpose flour provides carbohydrates for energy, while the egg adds protein. By choosing healthier toppings, you can enhance the nutritional value and enjoy a balanced meal.
Frequently Asked Questions
What are pikelets?
Pikelets are small, fluffy pancakes that are typically enjoyed as a snack or breakfast item. They are similar to American pancakes but are usually smaller and thicker.
Can I make pikelets ahead of time?
Yes, you can make pikelets ahead of time! They can be stored in an airtight container in the refrigerator for up to 2 days or frozen for longer storage. Reheat them in the toaster or microwave when ready to serve.
How do I know when pikelets are ready to flip?
Pikelets are ready to flip when bubbles form on the surface and the edges appear set. They should be lightly golden brown on the bottom before you flip them.
What can I serve with pikelets?
Pikelets are versatile and can be served with a variety of toppings including fresh fruit, jam, whipped cream, honey, or even savory options like smoked salmon and cream cheese.
Are pikelets suitable for freezing?
Yes, pikelets freeze well! Place them in a single layer on a baking sheet to freeze, then transfer them to a zip-top bag for longer storage.
Conclusion
In conclusion, making pikelets is a simple and rewarding process that yields delicious results. These fluffy pancakes are perfect for any occasion, and their versatility allows you to customize them to your liking. So why not gather your ingredients and give this recipe a try? We’d love to hear about your pikelet adventures! Don’t forget to comment below, share this article with friends, and try out more fantastic recipes from our collection, such as Lentil Soup or Pumpkin Soup. Happy cooking!
For more delicious recipes, check out our Pinterest page here.
Classic Pikelets
Ingredients
Equipment
Method
- In a large mixing bowl, combine the all-purpose flour, sugar, baking powder, and salt. Whisk together until well blended.
- In a separate bowl, whisk together the milk, egg, and melted butter until fully combined.
- Gradually pour the wet ingredients into the dry ingredients. Stir gently until just combined; be careful not to overmix. The batter should be slightly lumpy.
- Heat a non-stick skillet or griddle over medium heat. Add a small amount of butter to the pan, allowing it to melt and coat the surface.
- For each pikelet, pour about 2 tablespoons of batter onto the skillet. Cook until bubbles form on the surface and the edges look set, about 2-3 minutes.
- Flip the pikelet and cook for an additional 1-2 minutes, or until golden brown and cooked through.
- Remove from the skillet and keep warm. Repeat with the remaining batter, adding more butter to the skillet as needed.
- Serve the pikelets warm, topped with your favorite jam, fresh fruit, or whipped cream.