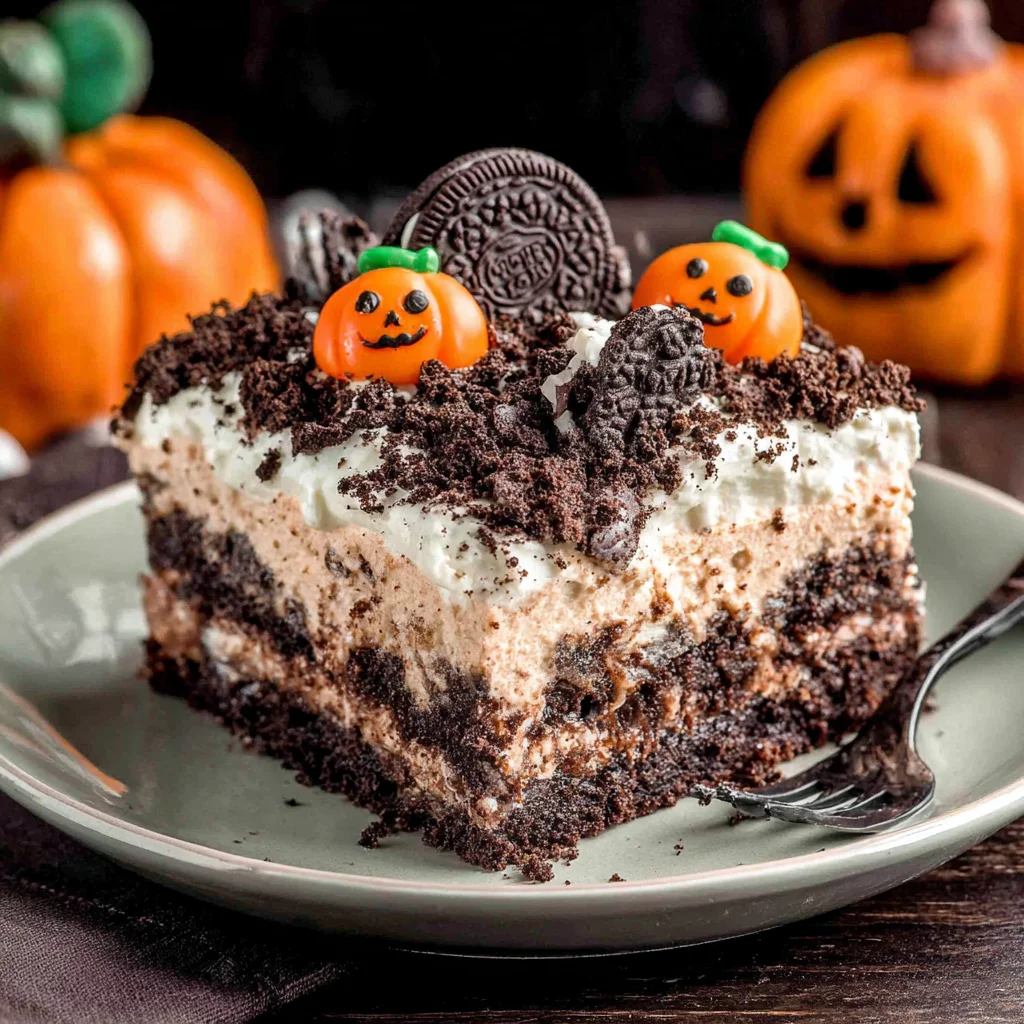
Get ready to dig into a deliciously spooky treat this Halloween! Our Halloween Dirt Cake is the perfect no-bake dessert that’s both easy to make and guaranteed to impress your guests. Forget the traditional pumpkin pie; this fun and festive dessert is a guaranteed crowd-pleaser, especially with the kids. Imagine layers of rich chocolate pudding, topped with a crumbly “dirt” made from crushed Oreo cookies and cocoa powder, and finished with wiggly gummy worms! It’s a captivating visual spectacle that’s just as delightful to eat. This Halloween Dirt Cake recipe is incredibly versatile; you can easily adapt it to fit your dietary needs or personal preferences, making it a truly customizable dessert. So grab your mixing bowls and let’s get started on creating this hauntingly delicious masterpiece! This recipe is perfect for Halloween parties, family gatherings, or even a spooky movie night. Let’s explore everything that makes this Halloween Dirt Cake so special.
Why You’ll Love This Halloween Dirt Cake Recipe
There are countless reasons why this Halloween Dirt Cake recipe will become your go-to spooky dessert. First and foremost, it’s incredibly easy to make. No complicated baking techniques or precise oven temperatures are needed. The simple steps and minimal preparation time make it perfect for busy individuals or those with limited baking experience. It’s a perfect choice for a last-minute Halloween party. Learn more about our easy recipes
Secondly, it’s incredibly versatile. The base recipe is easily adaptable to various dietary needs. Want a gluten-free version? Simply substitute gluten-free chocolate sandwich cookies. Looking for a vegan option? Use vegan chocolate pudding and cookies. The possibilities are endless! This ensures that everyone can enjoy this delicious Halloween treat, regardless of dietary restrictions.
Beyond its ease and adaptability, the Halloween Dirt Cake is undeniably delicious. The combination of rich chocolate pudding, the slightly bitter cocoa-infused cookie crumbs, and the sweet chewiness of the gummy worms creates a flavor profile that is both satisfying and unexpected. The textural contrast between the creamy pudding and the crumbly dirt adds another layer of enjoyment. This dessert perfectly balances sweetness and subtle bitterness making it truly irresistible.
Finally, the Halloween Dirt Cake is incredibly fun and visually appealing. The creative presentation, complete with gummy worms peeking out from the “dirt,” adds a playful touch that’s perfect for Halloween. This dessert is sure to be a conversation starter at your next gathering, adding a touch of spooky fun to your celebrations. It’s perfect for a Halloween party, a family dinner, or even a spooky movie night at home.
Why You Should Try This Halloween Dirt Cake Recipe
This isn’t just another Halloween dessert; it’s an experience! Beyond the delicious taste and ease of preparation, this recipe offers several compelling reasons to give it a try. Firstly, it’s a great way to get the kids involved. Crushing cookies, layering the ingredients, and decorating with gummy worms are all kid-friendly tasks that make baking a fun family activity. It’s a fantastic opportunity to bond with your family while creating a memorable Halloween treat.
Secondly, the Halloween Dirt Cake is a cost-effective option compared to other elaborate Halloween desserts. The ingredients are readily available and inexpensive, making it a budget-friendly choice for your Halloween celebrations. You don’t need expensive specialty ingredients or tools to create this magnificent dessert. Check out more of our budget-friendly recipes!
The recipe also offers an opportunity for creative expression. While the basic recipe is straightforward, it provides ample room for customization. Feel free to experiment with different cookie types, add other candies, or create intricate worm designs. This allows for personalization and creates a truly unique Halloween dessert every time.
Finally, this Halloween Dirt Cake is a perfect make-ahead dessert. Prepare it hours or even a day in advance, allowing you to focus on other Halloween preparations. Its no-bake nature means it requires no last-minute oven time, reducing your stress and freeing you up to enjoy your Halloween celebrations fully.
Ingredients and Necessary Utensils for Your Halloween Dirt Cake
This section details the ingredients and utensils needed for your Halloween Dirt Cake. Accurate measurements and high-quality ingredients ensure a perfect result. The following list provides a detailed breakdown of each ingredient and its function.
Ingredients:
- “Dirt” Ingredients:
- 1 package (18 ounces) chocolate sandwich cookies (like Oreos), finely crushed (about 4 cups): This forms the base of our spooky dirt, providing a rich chocolate flavor and crumbly texture. Ensure you crush them finely for a realistic dirt effect. Consider using a food processor for even crushing.
- ½ cup unsweetened cocoa powder: Enhances the chocolate flavor of the “dirt” and deepens its color. Using unsweetened cocoa powder helps prevent excessive sweetness.
- ½ cup milk: Acts as a binder, helping to moisten the cookie crumbs and create a cohesive “dirt” mixture. Whole milk is preferred for creaminess, but any type will work.
- ¼ cup vegetable oil: Adds moisture and helps create a slightly more pliable “dirt” mixture. It also contributes to a richer flavor.
- “Worms” Ingredients:
- 1 package (3 ounces) gummy worms: The star of the show! These add a fun, wiggly, and unexpectedly delicious element to your Halloween Dirt Cake. Choose your preferred brand and flavor.
- “Pudding” Ingredients:
- 1 (3.4 ounce) package instant chocolate pudding mix: The creamy, decadent heart of this dessert. Choose your favorite brand; they all work great.
- 2 cups cold milk: Essential for preparing the chocolate pudding according to the package instructions. Use cold milk for optimal thickness and texture.
- “Grass” Ingredients (Optional):
- 1 cup crushed green cookies (e.g., green-colored Oreos): Adds a vibrant touch of color and texture, mimicking grass around the edges. If you can’t find green cookies, you can use other crushed green candies.
Utensils:
- Large mixing bowl: For preparing the “dirt” mixture.
- Medium mixing bowl: For preparing the chocolate pudding.
- Whisk: For smoothly blending the pudding mix and milk.
- Measuring cups and spoons: For accurate ingredient measurements.
- Food processor or zip-top bag and rolling pin: For crushing the cookies finely.
- Individual serving glasses or a large trifle bowl: For layering and serving the Halloween Dirt Cake.
- Spatula or spoon: For layering the ingredients neatly.
- Refrigerator: For chilling the cake to allow the pudding to set.
Detailed Recipe Steps for Your Halloween Dirt Cake
Follow these steps to create your perfect Halloween Dirt Cake. This recipe is designed for ease and clear instructions, so even novice bakers can succeed.
Step 1: Preparing the “Dirt”
- Crush the cookies: Place the chocolate sandwich cookies in a food processor and pulse until finely crushed, resembling dirt. Alternatively, place the cookies in a zip-top bag and crush them using a rolling pin. The finer the crush, the more realistic the “dirt” will look.
- Combine the ingredients: In a large mixing bowl, combine the crushed cookies, cocoa powder, milk, and vegetable oil. Mix thoroughly until a moist, crumbly mixture forms. If it’s too dry, add a tablespoon of milk at a time until you reach the desired consistency. **Avoid overmixing**, as this can make the “dirt” too compact.
- Set aside: Once the “dirt” mixture is ready, set it aside while you prepare the pudding.
Step 2: Preparing the Pudding
- Whisk the pudding: In a separate medium-sized mixing bowl, whisk together the instant chocolate pudding mix and cold milk according to the package directions. **Whisk vigorously for at least two minutes** to ensure there are no lumps. This creates a smooth and creamy pudding base.
- Let it stand: Once the pudding is fully mixed, let it stand for about 5 minutes to allow it to slightly thicken. This helps the pudding hold its shape when layered.
Step 3: Assembling the Halloween Dirt Cake
- Layer the ingredients: In individual serving glasses or a large trifle bowl, begin layering the ingredients. Start with a layer of the chocolate pudding, followed by a layer of the “dirt” mixture. Repeat these layers, ending with a layer of “dirt” on top. You can adjust the layer thickness according to your preference.
- Even layering is key: Use a spatula or spoon to spread each layer evenly to create a visually appealing dessert. Gently tap the bowl or glasses to help the layers settle.
Step 4: Adding the Worms
- Press in the worms: Gently press the gummy worms into the top layer of “dirt.” Arrange them to resemble worms crawling in the soil. You can create a fun and creepy design, adding a touch of whimsy to your dessert.
Step 5: Adding the Grass (Optional)
- Sprinkle the grass: If using, sprinkle the crushed green cookies around the edges of the glasses or bowl to create a “grassy” border. This detail adds a whimsical touch and enhances the Halloween theme. Use a small spoon or your fingers to create a neat border.
Step 6: Chilling the Halloween Dirt Cake
- Refrigerate for at least 30 minutes: Refrigerate the Halloween Dirt Cake for at least 30 minutes to allow the pudding to set completely and the flavors to meld. This improves the overall texture and taste of the dessert.
Step 7: Serving and Enjoying Your Halloween Dirt Cake
- Serve chilled: Serve the chilled Halloween Dirt Cake and enjoy this spooky and delicious treat! It’s perfect for Halloween parties, family gatherings, or a cozy night in.
Tips and Variations for Your Halloween Dirt Cake
Experiment with different ingredients and techniques to personalize your Halloween Dirt Cake. These tips and variations help you avoid common mistakes and create unique variations.
- Ingredient Alternatives: Use different types of chocolate cookies, such as double stuffed Oreos for a richer chocolate flavor, or even gluten-free options for those with dietary restrictions. Experiment with different types of gummy candies, like gummy bears or other Halloween-themed gummies.
- Vegan Variation: Use vegan chocolate pudding and cookies to make a vegan-friendly version. Ensure all ingredients are certified vegan to maintain the integrity of your recipe.
- Gluten-Free Variation: Use gluten-free chocolate sandwich cookies to create a gluten-free Halloween Dirt Cake. Confirm that all other ingredients are also gluten-free.
- Adding Extras: Consider adding other Halloween-themed candies, such as chocolate chips, sprinkles, or mini chocolate candies to enhance the visual appeal and flavor profile.
- Avoiding Common Mistakes: Ensure cookies are finely crushed for optimal texture. Avoid overmixing the “dirt” mixture to prevent it from becoming too compact. Let the pudding set properly before serving to prevent a messy dessert.
Nutritional Values and Benefits of Your Halloween Dirt Cake
While this isn’t a health food, let’s examine the nutritional aspects of the ingredients. The nutritional information provided below is an approximation and may vary depending on the specific brands and quantities used. It’s always advisable to use a nutrition calculator for precise values.
A single serving (approximately 1 cup) of this Halloween Dirt Cake will contain:
- Calories: Approximately 350-400 calories
- Protein: Approximately 4-5 grams
- Fat: Approximately 18-20 grams
- Carbohydrates: Approximately 50-55 grams
Benefits of Ingredients: Chocolate contains antioxidants that are beneficial for health. Milk provides calcium, essential for bone health. Cookies provide energy.
Remember that this is a treat, and moderation is key for a balanced diet. Enjoy it in moderation as part of a healthy lifestyle.
FAQs about Halloween Dirt Cake
How long does Halloween Dirt Cake last?
Store your Halloween Dirt Cake in the refrigerator for up to 3 days for optimal freshness. The pudding will begin to separate slightly after that time.
Can I make the Halloween Dirt Cake ahead of time?
Absolutely! This is a fantastic make-ahead dessert. Prepare it a day or two in advance and store it in the refrigerator until ready to serve.
What can I use instead of gummy worms?
You can use any Halloween-themed candies, such as gummy spiders, gummy bats, or even chocolate-covered candies to decorate your Halloween Dirt Cake.
Is this Halloween Dirt Cake recipe gluten-free?
The base recipe isn’t inherently gluten-free. However, you can easily adapt it by using gluten-free chocolate sandwich cookies and checking that the pudding mix is gluten-free.
Can I freeze Halloween Dirt Cake?
Freezing this particular recipe isn’t recommended as the pudding’s texture may change upon thawing. It’s best enjoyed fresh.
Conclusion: Your Spooktacular Halloween Dirt Cake Awaits!
This Halloween Dirt Cake recipe is a fun, easy, and delicious way to celebrate the spooky season. Its versatility allows for customization to fit various dietary needs and preferences, making it a perfect treat for everyone. The ease of preparation, coupled with its impressive visual appeal, makes it an ideal dessert for both novice and experienced bakers. Don’t forget to share your Halloween Dirt Cake creations with us on social media! We would love to see your spooky masterpieces. Tag us and use #HalloweenDirtCake to share your delicious creations. Happy baking, and have a spooktacular Halloween!
For more delicious recipes, check out our other fun Halloween treats: Spooky Spiderweb Halloween Brownies and Hot Dog Mummies!
And don’t forget to check out our other amazing recipes on our blog: RecipesLuna
Follow us on Pinterest for more recipe inspiration! Pinterest
Spooky Halloween Dirt Cake
Ingredients
Equipment
Method
- Crush chocolate sandwich cookies into fine crumbs. In a large bowl, combine crushed cookies, cocoa powder, milk, and vegetable oil. Mix until crumbly.
- In a separate bowl, whisk together chocolate pudding mix and cold milk for 2 minutes until smooth. Let stand for 5 minutes to thicken slightly.
- In individual serving glasses or a trifle bowl, layer pudding and 'dirt' mixture, ending with a layer of 'dirt'.
- Press gummy worms into the top layer of 'dirt'.
- Optional: Sprinkle crushed green cookies around the edges for 'grass'.
- Refrigerate for at least 30 minutes to allow pudding to set.
- Serve chilled and enjoy!