Indulge in the rich, creamy delight of a homemade Chocolate Cream Pie! This classic dessert is easier to make than you might think, delivering a luxurious experience with every bite. From the buttery graham cracker crust to the intensely chocolatey, whipped cream filling, this Chocolate Cream Pie is the perfect ending to any meal or celebration. This recipe provides a simple, step-by-step guide to creating this beloved dessert, ensuring a flawless result every time. Whether you’re a seasoned baker or a kitchen novice, you’ll find this Chocolate Cream Pie recipe incredibly accessible and rewarding. Get ready to impress your friends and family with this irresistible treat, a testament to the simple elegance of classic baking.
Why You’ll Love This Chocolate Cream Pie Recipe
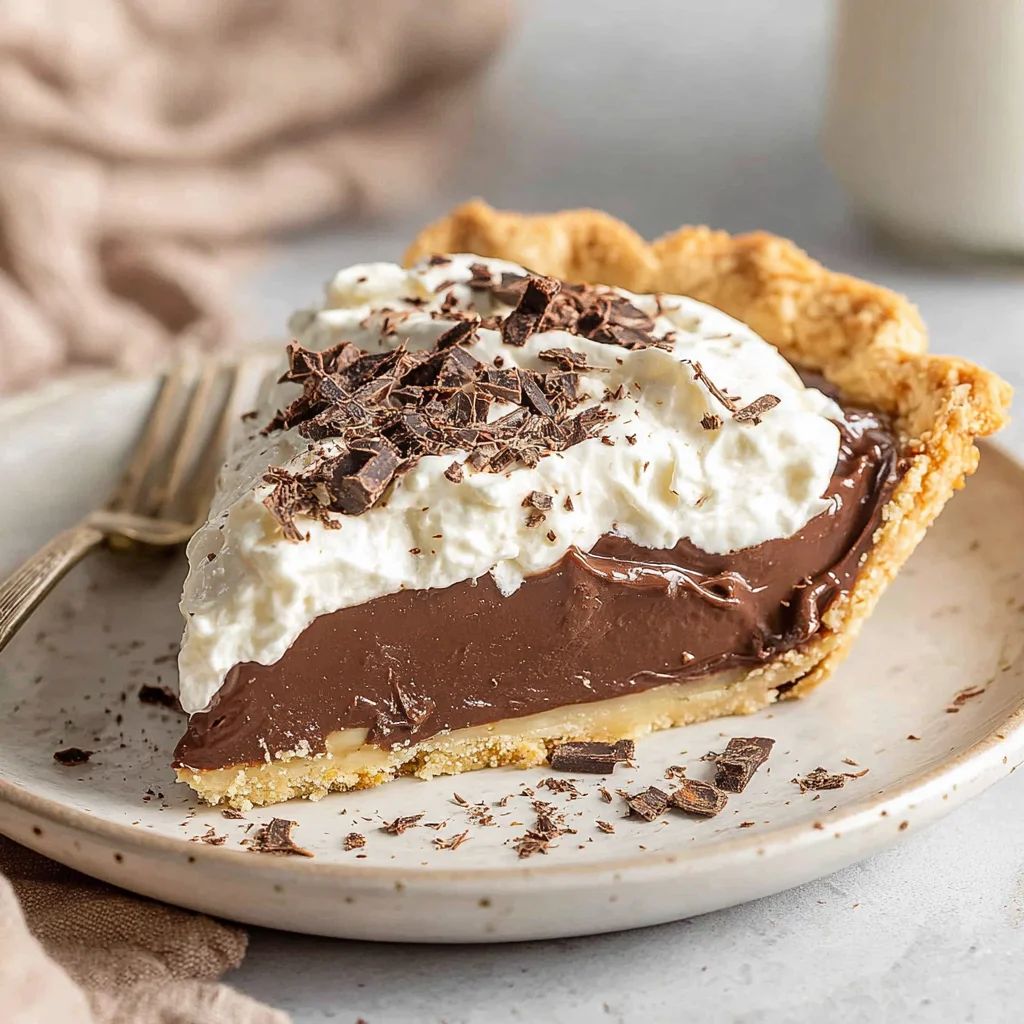
This Chocolate Cream Pie recipe isn’t just another dessert; it’s an experience. There are so many reasons why you’ll fall head over heels for this recipe. First, the flavor combination is unbeatable. The delicate sweetness of the graham cracker crust perfectly complements the intensely rich chocolate cream filling. The whipped cream topping adds a touch of lightness and airy texture, creating a delightful contrast to the dense, decadent filling. Second, the texture is simply divine. The crisp, crumbly crust provides a satisfying crunch, while the filling boasts a velvety smoothness that melts in your mouth. This textural contrast is what truly elevates this Chocolate Cream Pie above other desserts. Third, this recipe is surprisingly easy to make. With straightforward instructions and readily available ingredients, you’ll be whipping up this delicious pie in no time. Even beginner bakers can achieve professional-looking results with this simple recipe.
Beyond the taste and texture, this Chocolate Cream Pie offers versatility. Feel free to experiment with different toppings, such as fresh berries, chocolate shavings, or even a sprinkle of sea salt for an unexpected touch. You can also adapt the crust to suit your preferences, using Oreo crumbs, digestive biscuits, or even a shortbread base. The possibilities are endless! Finally, the satisfaction of creating a homemade Chocolate Cream Pie is unmatched. There’s something truly special about sharing a homemade dessert with loved ones, knowing you poured your heart (and skill) into creating something truly delicious. This Chocolate Cream Pie is a guaranteed crowd-pleaser, perfect for birthdays, holidays, or any occasion that calls for a special treat. It’s a recipe that will undoubtedly become a staple in your dessert repertoire.
Why You Should Try This Chocolate Cream Pie Recipe
In a world of pre-made desserts and complicated recipes, this Chocolate Cream Pie recipe stands out for its simplicity and exceptional taste. It’s a perfect balance of ease and indulgence. You don’t need specialized baking equipment or years of culinary experience to create a stunning Chocolate Cream Pie. The clear instructions guide you through each step, ensuring even novice bakers can achieve a delicious result. This recipe is a testament to the power of quality ingredients and a few simple techniques. The result? A gourmet-quality dessert that surpasses anything you could find in a store.
Furthermore, this recipe offers incredible value. Compared to buying a similar pie from a bakery, making it at home significantly reduces the cost while allowing for complete control over the ingredients. You can use higher-quality chocolate, organic cream, and fresh vanilla extract, resulting in a superior taste. This makes it a financially smart and incredibly delicious choice. Beyond the practical benefits, this Chocolate Cream Pie recipe offers a sense of accomplishment. The joy of creating something beautiful and delicious from scratch is incredibly satisfying, adding an extra layer of enjoyment to the entire experience. It’s a recipe that not only delivers a stunning dessert but also provides a rewarding baking experience.
Finally, this recipe is perfect for sharing. Imagine the smiles on your friends and family’s faces as they savor each bite of your homemade Chocolate Cream Pie. It’s a dessert that sparks joy and creates lasting memories. It’s more than just a pie; it’s a symbol of care and effort, making it the ideal dessert for any gathering or special occasion. So, why not try this Chocolate Cream Pie recipe and experience the magic for yourself? It’s a dessert that’s as impressive as it is delicious, and it’s guaranteed to become a new family favorite. For more delicious dessert recipes, check out our Hot Chocolate Fudge recipe!
Ingredients and Utensils for Your Chocolate Cream Pie
Gathering the right ingredients and tools is crucial for baking success. This section details everything you need for a perfectly crafted Chocolate Cream Pie.
Ingredients: A Detailed Breakdown
- For the Crust:
- 1 ½ cups (190g) graham cracker crumbs: These provide the classic crumbly base. Look for high-quality graham crackers for the best flavor. You can also pulse graham crackers in a food processor for consistent crumbs.
- ¼ cup (50g) granulated sugar: Adds sweetness and helps bind the crust.
- 6 tablespoons (3 ounces) unsalted butter, melted: Provides moisture and holds the crust together. Make sure the butter is fully melted before mixing.
- For the Chocolate Cream Filling:
- 1 cup (240ml) heavy cream: This is essential for creating a light and fluffy filling. Ensure your cream is very cold for optimal whipping.
- 14 ounces (397g) sweetened condensed milk: Provides sweetness and creamy texture. Do not substitute with regular milk.
- 6 ounces (170g) semi-sweet chocolate, finely chopped: The star of the show! Use high-quality chocolate for the best flavor. Finely chopping ensures even melting.
- 1 teaspoon vanilla extract: Enhances the overall flavor profile. Use pure vanilla extract for the best results.
- For the Topping (Optional):
- Whipped cream: Adds a light and airy finish.
- Chocolate shavings: For a beautiful and decadent touch.
Essential Utensils for Baking Success
- 9-inch pie plate: The foundation for your Chocolate Cream Pie.
- Medium bowls (at least 2): For mixing the crust and the filling.
- Measuring cups and spoons: Accuracy is key in baking.
- Whisk: For combining the dry ingredients and incorporating the melted butter.
- Electric mixer (handheld or stand): Essential for whipping the heavy cream to stiff peaks.
- Rubber spatula or wooden spoon: For gently folding the chocolate mixture into the whipped cream.
- Medium saucepan: For melting the chocolate and condensed milk.
- Wire rack: For cooling the crust.
- Food processor (optional): For quickly processing graham crackers into crumbs.
Detailed Chocolate Cream Pie Recipe Steps
Follow these steps carefully for a perfect Chocolate Cream Pie:
Making the Crust: A Foundation of Flavor
- Preheat your oven to 350°F (175°C). This ensures the crust bakes evenly.
- Combine graham cracker crumbs and sugar in a medium bowl. Mix well to distribute the sugar evenly.
- Gradually add the melted butter, stirring until the mixture is evenly moistened. Don’t overmix, as this can make the crust tough. The mixture should resemble wet sand.
- Firmly press the crumb mixture into the bottom and up the sides of a 9-inch pie plate. Use the bottom of a measuring cup or your fingers to create an even layer.
- Bake for 8-10 minutes, or until the crust is lightly golden. Keep a close eye on it to prevent burning. Every oven is different!
- Let the crust cool completely on a wire rack before adding the filling. This prevents the filling from melting and ensures a stable pie.
Creating the Chocolate Cream Filling: The Heart of the Pie
- In a medium saucepan over medium-low heat, combine sweetened condensed milk and chopped chocolate. Stir constantly until the chocolate is melted and the mixture is smooth and glossy. Avoid burning the mixture by keeping the heat low and stirring frequently.
- In a separate bowl, beat heavy cream with an electric mixer until stiff peaks form. This is crucial for a light and airy filling. Make sure your cream is very cold for optimal whipping.
- Gently fold the melted chocolate mixture into the whipped cream using a rubber spatula or wooden spoon. Do this in a circular motion to avoid deflating the whipped cream. Fold until just combined – don’t overmix.
- Stir in vanilla extract. This enhances the flavor of the chocolate cream.
- Pour the chocolate cream filling into the cooled crust. Spread it evenly.
- Refrigerate for at least 4 hours, or preferably overnight, to allow the filling to set. The longer it chills, the firmer the filling will become.
Serving Your Chocolate Cream Pie: The Grand Finale
- Top with whipped cream and chocolate shavings, if desired. This adds a beautiful finishing touch.
- Slice and serve chilled. Enjoy every creamy, decadent bite!
Tips and Variations for Your Chocolate Cream Pie
Elevate your Chocolate Cream Pie with these helpful tips and creative variations:
- Crust Alternatives: Experiment with different crusts, such as Oreo cookie crumbs, digestive biscuits, or even a homemade shortbread crust for unique flavor profiles. These pecan pie cookies would make an amazing alternative!
- Chocolate Variations: Use dark chocolate, milk chocolate, or a combination for a customized flavor. You can even add a pinch of espresso powder or instant coffee for a mocha twist.
- Flavor Boosters: Add a tablespoon of instant coffee granules to the chocolate mixture for a mocha-flavored Chocolate Cream Pie or a dash of peppermint extract for a refreshing holiday twist.
- Topping Ideas: Get creative with your toppings! Try fresh berries, chocolate curls, toasted nuts, or a sprinkle of sea salt for a unique flavor contrast.
- Avoiding Common Mistakes: Ensure your heavy cream is very cold when whipping to achieve stiff peaks. Don’t overmix the chocolate mixture into the whipped cream, as this will deflate it. Let the crust cool completely before adding the filling to prevent it from melting.
- Vegan Variation: Use vegan butter and graham crackers, coconut cream, and vegan chocolate chips. Make sure to check all your ingredients are certified vegan.
- Gluten-Free Variation: Use gluten-free graham cracker crumbs or make your own crust using almond flour or gluten-free digestive biscuits.
Nutritional Information and Health Benefits of Chocolate Cream Pie
While Chocolate Cream Pie is undeniably indulgent, let’s explore its nutritional profile and the potential benefits of its key ingredients:
Note: Nutritional information is approximate and will vary depending on the specific brands and quantities of ingredients used. This is an estimate based on common ingredients.
Approximate Nutritional Information (per slice):
- Calories: Approximately 450-500
- Protein: Approximately 4-5 grams
- Fat: Approximately 25-30 grams
- Carbohydrates: Approximately 60-70 grams
Health Benefits of Key Ingredients:
- Dark Chocolate (if used): Contains antioxidants that may contribute to improved heart health.
- Heavy Cream: A source of fat-soluble vitamins like A, D, E, and K.
- Graham Crackers: A source of whole grains (depending on brand), providing fiber.
Important Note: This is a dessert best enjoyed in moderation. While some ingredients offer minor health benefits, the overall high calorie and fat content makes it a treat to be savored occasionally rather than consumed regularly.
FAQs about Chocolate Cream Pie
FAQs
How long does Chocolate Cream Pie last in the refrigerator?
A Chocolate Cream Pie is best enjoyed within 3-4 days of making it. After that, the crust may become soggy, and the filling’s texture may change.
Can I make the Chocolate Cream Pie crust ahead of time?
Absolutely! You can make the crust a day or two in advance and store it in an airtight container at room temperature. Just bake it when ready to assemble the pie.
Is it necessary to use an electric mixer for the whipped cream?
While an electric mixer is ideal for achieving stiff peaks quickly, you can use a whisk for a good arm workout. It will just take a little longer.
What can I substitute for heavy cream in the Chocolate Cream Pie filling?
While heavy cream provides the best texture, you could try using whipped topping or even a combination of full-fat coconut milk and whipped coconut cream for a vegan alternative.
Can I freeze Chocolate Cream Pie?
It’s not recommended to freeze the entire pie. The texture of the crust and filling may change upon thawing. It’s best to enjoy this pie fresh.
Conclusion: Indulge in Your Homemade Chocolate Cream Pie
This Chocolate Cream Pie recipe is a testament to the fact that sometimes, the simplest recipes deliver the most exquisite results. With its perfect blend of textures and flavors, this pie is a guaranteed crowd-pleaser, perfect for any occasion. Remember to follow the steps carefully, paying attention to the details, and don’t be afraid to experiment with different toppings and flavor variations. The satisfaction of creating this delicious dessert from scratch is truly rewarding. So, gather your ingredients, put on your apron, and embark on this delicious baking journey! Share your experience in the comments below, and don’t forget to share this recipe with your friends and family. You can also find more inspiration for delicious desserts on our Pinterest page: RecipesLuna Pinterest. Happy baking!
Classic Chocolate Cream Pie
Ingredients
Equipment
Method
- Preheat oven to 350°F (175°C). In a medium bowl, combine graham cracker crumbs and sugar.
- Stir in melted butter until evenly moistened. Press crumb mixture firmly into the bottom and up the sides of a 9-inch pie plate.
- Bake for 8-10 minutes, or until lightly golden. Let cool completely on a wire rack.
- In a medium saucepan over medium-low heat, combine sweetened condensed milk and chopped chocolate. Stir constantly until chocolate is melted and the mixture is smooth. Remove from heat.
- In a separate bowl, beat heavy cream with an electric mixer until stiff peaks form.
- Gently fold the melted chocolate mixture into the whipped cream until just combined. Stir in vanilla extract.
- Pour the chocolate cream filling into the cooled crust. Refrigerate for at least 4 hours, or preferably overnight, to allow the filling to set.
- Top with whipped cream and chocolate shavings, if desired. Slice and serve chilled.